I admit that my AWS are rudimentary. I can get by okay with basic console management, but I am completely new to the CDK (Cloud Development Kit). This is going to be the first in a multi-part series in which you and I will explore the CDK together and hopefully build some exciting things in the process. These posts also give me the chance to share what I’ve learned, and to bolster my learning. After all, a great way to learn is by explaining!
In this article we’re going to:
- Setup the CDK in a Docker container
- Create a new boilerplate CDK project
- Deploy a new S3 instance to AWS
- Upload files from a folder to our S3 instance
Get the Code!
To follow along, you can clone the repo here:
git clone git@github.com:andrewmobbsavi/awssdkintro.git
Docker and docker-compose are prerequisite installations.
Our code will be in Javascript.
After you’ve cloned the repo, you will find that the CDK has already been initialized in the data/ folder. the data/hello-cdks/ folder contains our CDK code.
Usually, to initialize a new CDK project, you would run the following command in your project folder:
cdk init app --language javascript
However, because I’ve already initialized the project, there’s no need for you to perform this step.
Setting up Docker
We are using Docker, so all of the setup has been taken care for you. Docker is a container system which lets you run different environments with minimal setup. Think of it as like a computer within your computer, almost like a virtual machine.
If you don’t have Docker installed, or you’ve never used Docker before, you will need to install it. We require both Docker and Docker-compose. You can install both of them by following these guides:
The Docker container has all of the npm dependencies set up for you, including CDK, so you don’t need to do a thing.
Add Your Credentials
Before you do anything, you’re going to have to register your credentials. You can do that in the main folder by copying the example env file:
cp aws.env.example aws.env
Inside your new aws.env file, you’ll see:
AWS_ACCESS_KEY_ID=
AWS_SECRET_ACCESS_KEY=
AWS_DEFAULT_REGION=
Add the details to this file.
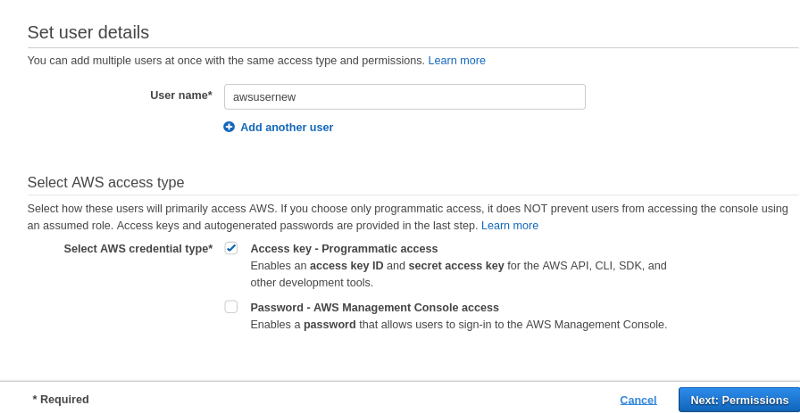
For access key details, you will need to create a new IAM profile with programmatic access. Don’t user your root account details!
Visit https://console.aws.amazon.com/iam/home#/users$new?step=details and create a new IAM user to access the CDK.
Give the new user Admin permissions:
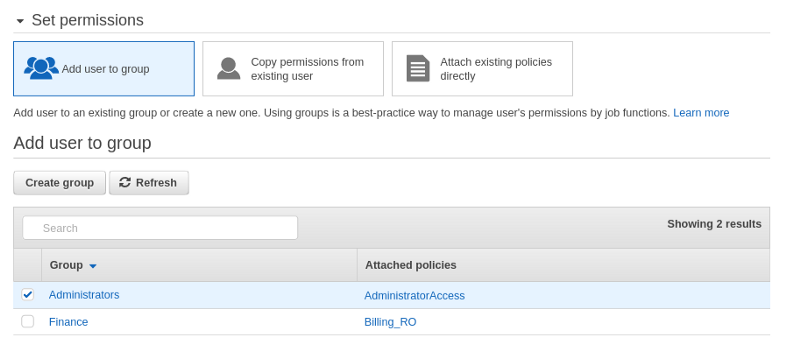
Just click through the subsequent tag etc. windows. There’s no need to enter any information for those.
After you’ve created your new user, you can now get your key information:
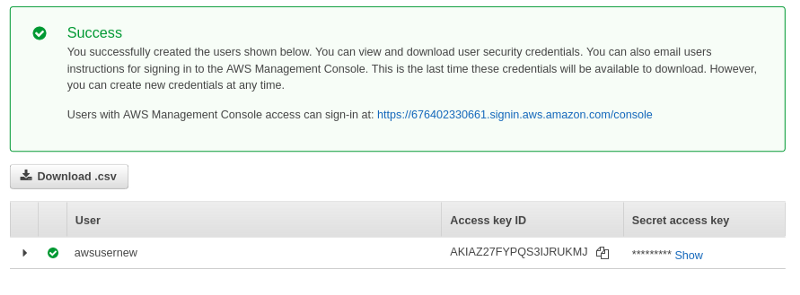
Add they key ID and key secret to your aws.env file.
To find the region, simply click the ‘Global’ tab at the top-right of your AWS console and find your desired region. Mine is ap-southeast-2.
Your aws.env file should look something like this:
AWS_ACCESS_KEY_ID=SDAFJJ4314AFDASFDF
AWS_SECRET_ACCESS_KEY=a74kk13232+cdxxkowq+cs5
AWS_DEFAULT_REGION=ap-southeast-2
Basic Files
In our repo, the data/files folder contains two test files which we will push to our s3 bucket. The data/hello-cdks/lib/hello-cdks-stack.js file contains our CDK-related code.
Contain Yourself!
It’s time to start ourcontainer! In the data/ folder type:
docker-compose up -d --build
This will run the commands in the docker-compose.yml file. Our docker-compose.yml file looks like this:
version: '3'
services:
  awscdk:
    env_file:
    - aws.env
    build:
      context: .
      dockerfile: Dockerfile
    image: node:14.18.2-buster-slim
    container_name: awscdk
    volumes:
      - ./data/:/root/data
      - /root/data/hello-cdks/node_modules
    network_mode: bridge
What we are doing is:
- Pulling a node image
- Registering the variables from aws.env as environment variables in the container
- Giving the container a name: awscdk
- Running the Dockerfile (explained later)
- Exposing our data/ folder to the /root/data folder in the container
- Exposing the /root/data/hello-cdks/node_modules/ folder to the data/hello-cdks/node_modules/ folder on our local system
- The node_modules folder needs to be exposed this way from the container because our Dockerfile runs npm install for us
- The ‘build’ flag tells docker-compose to run the build section of the docker-compose.yml file, essentially running the commands in the Dockerfile. We generally only need to run the build flag when we update the Dockerfile. Subsequent commands after initial build don’t require the ‘build’ flag:
docker-compose up -d
The -d flag tells docker-compose to run the containers in detached mode. This means we won’t see output on the screen.
Our Dockerfile has the following code:
FROM node:14.18.2-buster-slim
WORKDIR /root/data/hello-cdks
COPY data/hello-cdks /root/data/hello-cdks
RUN npm install
ENTRYPOINT ["tail", "-f", "/dev/null"]
What are we doing here?
We are telling the system to use the buster-slim node image. In that image, we are changing to the /root/data/hello-cdks. We are then copying the contents of our local data/hello-cdks directory to the /root/data/hello-cdks directory. Then, in /root/data/hello-cdks we are running npm install, which gives us all of our dependencies. Without this step, we would have to enter the container ourselves after the build and run npm install manually.
Finally, the following command makes it so that the container doesn’t exit:
ENTRYPOINT ["tail", "-f", "/dev/null"]
Head for the Clouds
Now that your container has started, run:
docker ps
You should see something similar to the following output:

Let’s enter our container! You can do this by running the following command on the container name, in our case awscdk:
docker exec -it awscdk bash
You should find yourself in the /root/data/hello-cdks folder.
Here, you can now run your CDK commands. We’ll start by listing the stacks from our app:
cdk ls
The output should be:
HelloCdksStack
This stack name reflects the HelloCdksStack class which is exported from /data/hello-cdks/lib/hello-cdks-stack.js.
If you were to have multiple classes, these would represent more stacks, and would be shown in the ‘cdk ls’ output.
Examining the Code
Let’s look more closely at the hello-cdks-stack.js file. Open the file up in your editor.
class HelloCdksStack extends cdk.Stack {
  /**
   *
   * @param {cdk.Construct} scope
   * @param {string} id
   * @param {cdk.StackProps=} props
   */
  constructor(scope, id, props) {
    super(scope, id, props);
// The code that defines your stack goes here
const bucket = new s3.Bucket(this, "Files", {
      websiteIndexDocument: "index.html",
      publicReadAccess: true,
      removalPolicy: cdk.RemovalPolicy.DESTROY,
      autoDeleteObjects: true
    });
new S3Deployment.BucketDeployment(this, "Deployment", {
      sources: [S3Deployment.Source.asset(path)],
      destinationBucket: bucket,
    });
new cdk.CfnOutput(this, "BucketDomain", {
      value: bucket.bucketWebsiteDomainName,
    });
  }
}
module.exports = { HelloCdksStack }
const cdk = require('@aws-cdk/core');
const s3 = require('@aws-cdk/aws-s3');
const S3Deployment = require('@aws-cdk/aws-s3-deployment');
- Importing the CDK
- Importing the S3 CDK functionality which will allow us to create S3 buckets on the fly
- Importing the S3 deployment functionality which will allow us to push files to our S3 buckets, again on the fly
const path = "/root/data/files";
This provides the path, in our container, to the files we wish to push to S3.
class HelloCdksStack extends cdk.Stack {
Our class declaration which declares a new stack. This is extended from the cdk object we imported earlier.
const bucket = new s3.Bucket(this, "Files", {
      websiteIndexDocument: "index.html",
      publicReadAccess: true,
      removalPolicy: cdk.RemovalPolicy.DESTROY,
      autoDeleteObjects: true
    });
Here is where we start the heavy lifting! The bucket const extends the s3 object we imported earlier from the cdk. Here, we are telling the cdk to:
- Create a new S3 bucket with the name “Files”. Your deployed s3 bucket would be thus named something like this: hellocdksstack-files8e6940b8–4uxc2z8xntcc
- Use index.html as the root document for public access
- Allow public read access to the bucket
- Allow the CDK to completely remove (destroy) this bucket. We can achieve this later on using the ‘cdk destroy’ command. If we didn’t include this directive, the ‘cdk destroy’ command would not work.
- Setting autoDeleteObjects to ‘true’ allows us to destroy the bucket. AWS only allows buckets which contain zero data to be destroyed. This removes all objects before destruction.
new S3Deployment.BucketDeployment(this, "Deployment", {
      sources: [S3Deployment.Source.asset(path)],
      destinationBucket: bucket,
    });
The code block above relates to deployment of files to the new S3 bucket we created in the preceding block. Here we are:
- Telling the cdk to deploy the contents of our ‘path’ constant, in this case ‘/root/data/files’, to the new bucket
- Telling the system the details of our S3 bucket via the destinationBucket handle. In this case, we are passing the ‘bucket’ const which we’d declared earlier in the code.
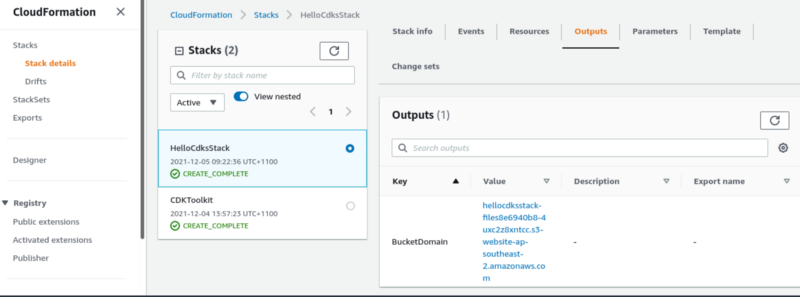
new cdk.CfnOutput(this, "BucketDomain", {
      value: bucket.bucketWebsiteDomainName,
    });
This provides output to the Cloudformation system, which can be viewed from the Cloudformation console. Here, we are essentially providing the base url to our new bucket. For this to work, the index.html file which we’d declared earlier needs to be included, otherwise visiting the output link on Cloudformation will yield a 404 error.
Tie Your Bootstraps!
The AWS documentation tells us the following:
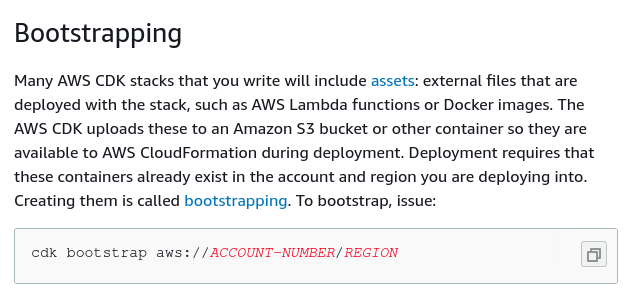
If you don’t do this, then the CDK resources you require for your stack won’t be there. Find your account number by clicking your username in the top-right corner of the AWS console. The region is the same one you entered in the aws.env file earlier on.
Make sure you run the cdk bootstrap command in the /root/data/hello-cdks folder in your container.
CDK Functions
At last! Let’s run some CDK functions. First, make sure you are in the /root/data/hello-cdks folder of the container.
Now, run the following command:
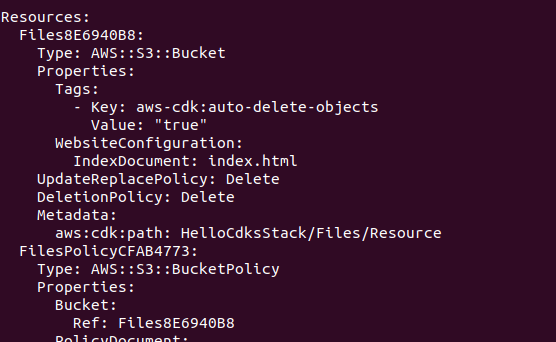
cdk synth
This command ‘synthesizes’ the stack in your app and creates a Cloudformation template. According to AWS this step is important because it “catches logical errors in defining your AWS resources.”.
If it’s worked correctly, you should see a whole load of output similar to this:
Next, let’s deploy this thing!
cdk deploy
You’ll be presented with output similar to this:
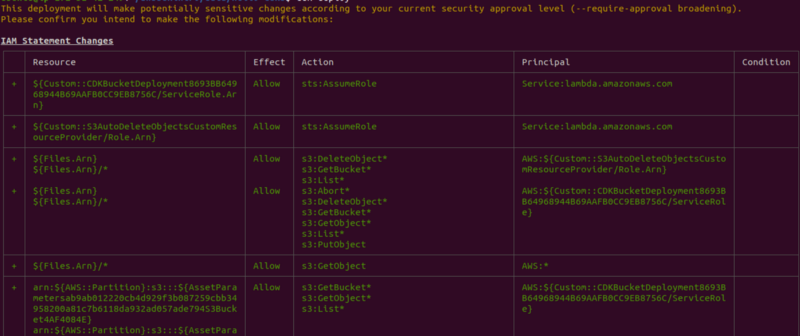
You’ll be asked if you wish to deploy the changes. Type “Y”!
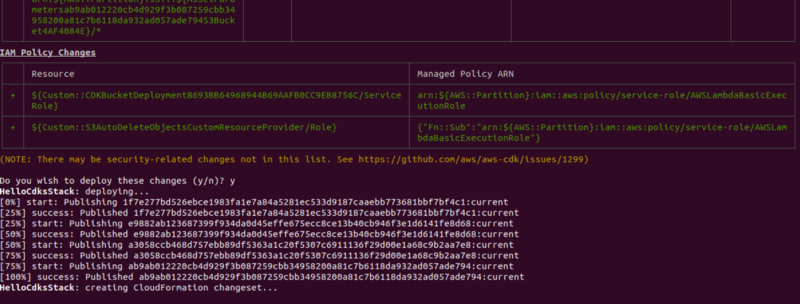
There you have it! You’ve successfully deployed a new S3 bucket to your CDK stack, and have pushed 2 test files.
Let’s verify via AWS console that this is really the case. Head over to the S3 section of the AWS console and click ‘Buckets’. You should see something similar to the following:
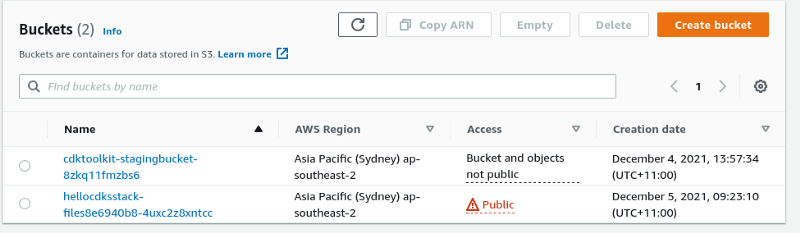
The hellocdksstack bucket is the one which we’ve just deployed. This contains our files. The stagingbucket is used by the CDK to provide resources. This was created during the bootstrapping process we’d defined earlier on.
Click on the hellocdksstack, and you will see the following:
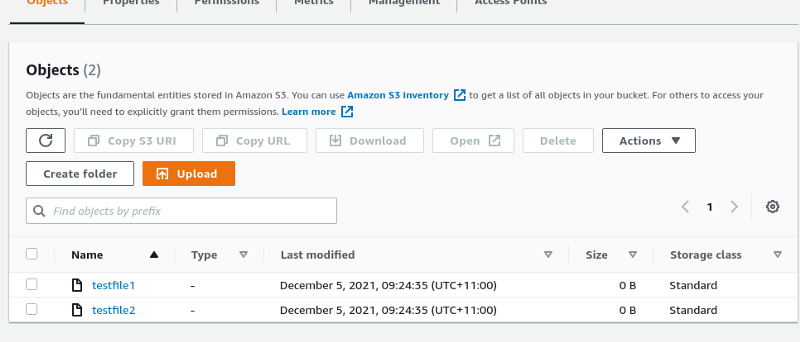
The two test files which were present on our local path are now in the s3 bucket. Fantastic!
Seek & Destroy!
Now that we’ve achieved what we set out to do — create an S3 bucket on the fly, and push files to it automatically — we need to remove our bucket. After all, we don’t want to incur unnecessary AWS charges!
Type the following:
cdk destroy
This will remove the bucket you’ve just deployed. You should see the following output:
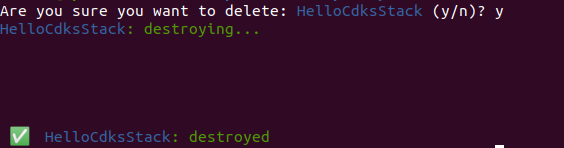
Checking back on the S3 AWS console shows that the bucket really has been destroyed.
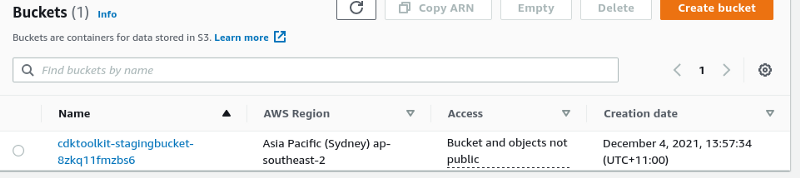
But wait a minute — the bootstrap staging bucket is still there. I don’t recommend removing this because it’s a core part of the CDK, and you will need it if you intend to continue with CDK programming.
If you do wish to remove it, you will need to do so manually via the console.
First, you need to empty all objects inside the bucket. Click the ‘empty’ tab:
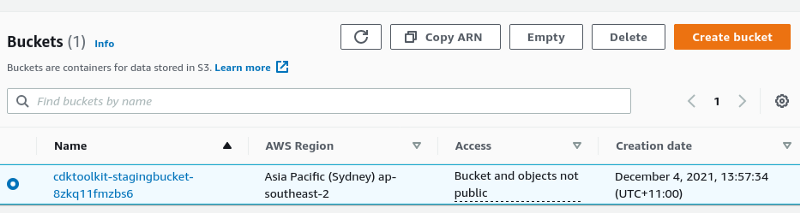
Now you can delete the bucket. Click the ‘delete’ tab.
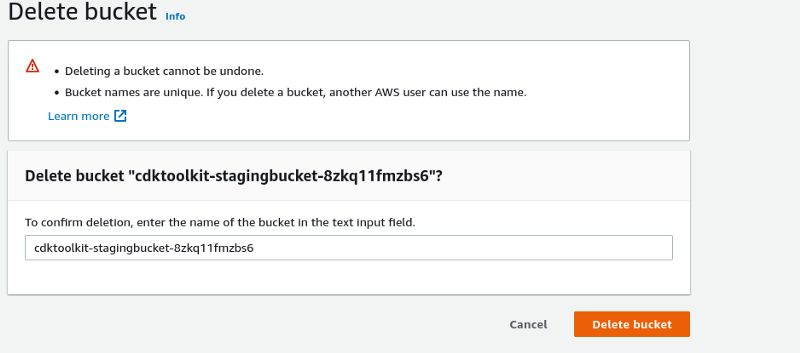
Your bucket will now be deleted!
However, there is another important step which you must take, otherwise if you try to use the CDK in again in future, you will encounter the following error:
[100%] fail: No bucket named ‘cdktoolkit-stagingbucket-########’. Is account ######### bootstrapped?
The solution?
Navigate to the AWS management console. Open CloudFormation. Look for and remove the stack called CDKToolkit.

The stack has now been removed! It’s as if the CDK has never been!
Summary
In this article you’ve learned how to:
- Run AWS CDK on Docker
- Bootstrap the CDK
- Synth the CDK
- Deploy an S3 bucket on the fly
- Upload files to S3 on the fly
- Destroy a CDK stack
I hope you’ve enjoyed this! I’ll continue to add more articles to help improve my learning, which I hope you will follow. Thanks for reading!
Other Resources
https://docs.aws.amazon.com/cdk/latest/guide/hello_world.html